# Azure
Select the **Azure** option from the list of providers. If you haven't already configured credentials for Azure you'll be asked to provide them now. Enter a **name** for your credentials then enter your **Subscription ID**, **Tenant ID**, **Client ID** and **Client Secret**. Once this is done, click **Save**.
{% hint style="info" %}
You can find more details on [setting up access to your Azure account](../../../settings/credentials/aks.md) in the [shared credentials documentation](../../../settings/credentials/).
{% endhint %}
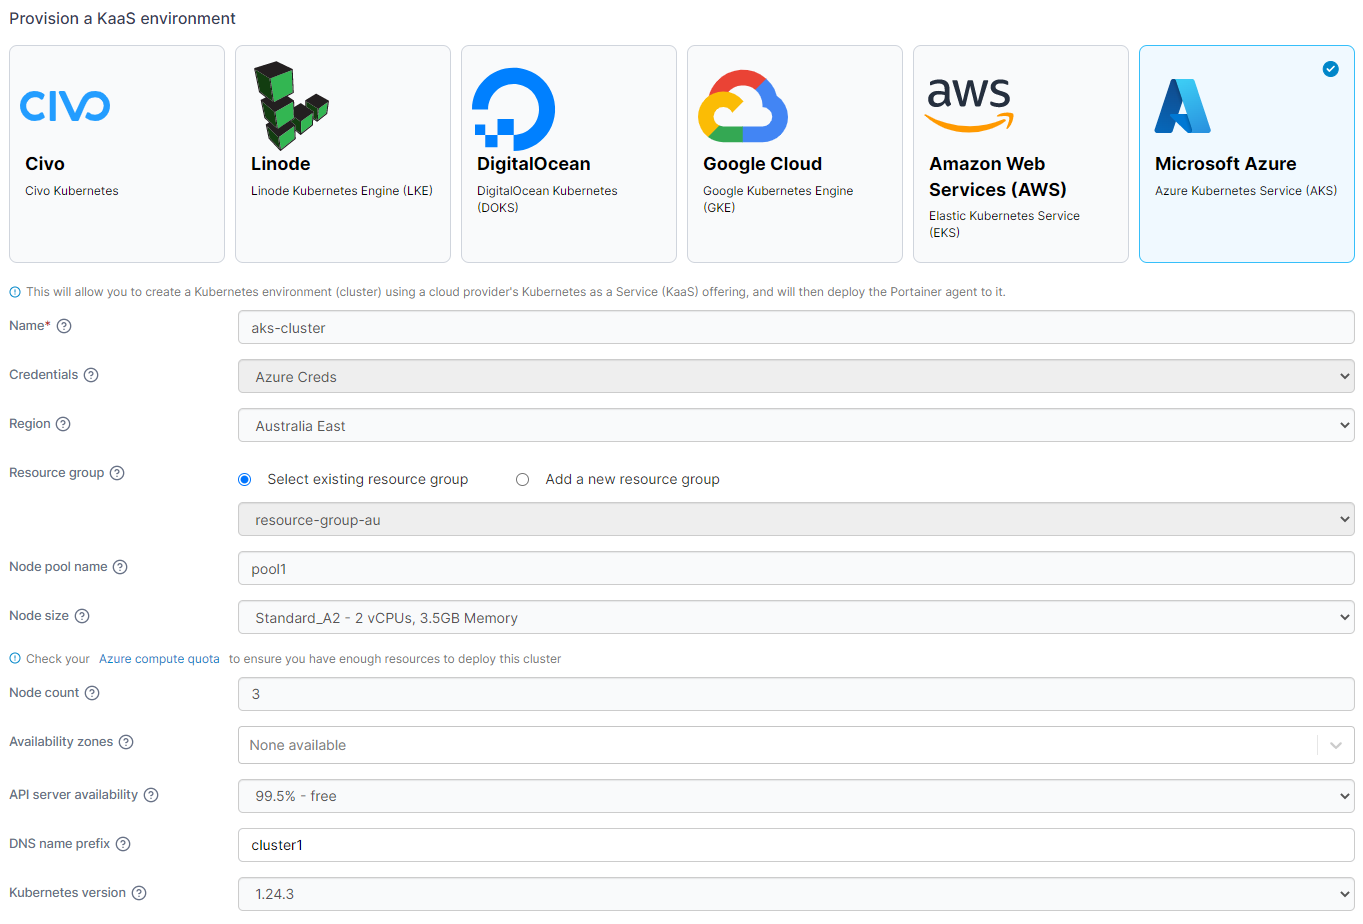
Once you have added your credentials (or if you already had them set up) select your cluster options from the fields below.
| Field/Option | Overview |
| ----------------------- | ----------------------------------------------------------------------------------------------------------------------------------------------------------- |
| Name | Enter a name for your cluster. |
| Credentials | Select the set of credentials to use for the provision. |
| Region | Select the region to deploy your cluster in. |
| Resource group | Select an existing resource group or add a new resource group for your cluster. |
| Node pool name | Enter a name for your node pool. |
| Node size | Select the size of the individual nodes in your cluster. |
| Node count | Enter the number of nodes to provision in your cluster. |
| Availability zones | Select the availability zones to use for your cluster. |
| API server availability | Select the uptime SLA you require for your cluster. |
| DNS name prefix | Enter the DNS name prefix to use with your cluster. You will use this to connect to the Kubernetes API when managing containers after creating the cluster. |
| Kubernetes version | Select the version of Kubernetes you want to deploy on your cluster |
{% hint style="info" %}
The environment options are refreshed automatically if the information cached by Portainer is over 12 hours old. You can manually refresh the options by clicking **Reload cluster details** under the **Actions** section.
{% endhint %}
You can also expand the **More settings** section and set groups and tags for your environment now or you can do this later.
Once you have made your selections, click **Provision environment** to begin the provision. If you have other environments to configure click **Next** to proceed, otherwise click **Close** to return to the list of environments where you will see the progress of your provision.